Wireless Site Survey for Indoor Access Points
November 2020
When it comes to wireless coverage, every environment will yield a different result. A solution that works in one home or office, may not work in another. Make sure you walk the site before installation. Being on site is crucial to identifying areas with possible drops in wireless coverage and/or radio interference. And you wouldn’t be able to account for environmental factors without physically being on site to conduct the wireless site survey.
What is a wireless site survey and why do you need it?
A wireless site survey is used in the planning and designing of a wireless network. It helps to ensure that there is enough wireless coverage in all the areas that the job requires. It also helps to identify and eliminate weak wireless signals or dead spots. Sometimes referred to as just a WiFi survey or RF site survey, a wireless site survey will also help test for interference and identify the optimal locations to install your wireless access points.

Wireless Site Survey Tools & Software
There are a number of free and paid tools available to help perform a basic wireless site survey. Take some time to research the different options that are available to find the best WiFi site survey tool and/or software for you and your project.
For simple indoor network applications, you can use your mobile phone or laptop to do a basic test on an indoor access point’s wireless range and signal strength. Your mobile device may be sufficient enough for a very basic wireless site survey, but a laptop can provide better detailed results. However, the site survey tools from a phone or laptop will only detect WiFi signals; in order to identify radio frequency interference and channel availability, you will need a spectrum analyzer.
A spectrum analyzer will detect everything running on the 2.4GHz and 5GHz bands. This can help identify interference from non-WiFi sources, such as microwaves, direct satellite services, power sources, cordless phones, electronics, or any number of wireless devices operating on the 2.4GHz and 5GHz bands (but aren’t necessarily considered “WiFi”). The spectrum analyzer can also help you determine which band is appropriate for the installation, where to place access points to avoid interference, and help identify the cause of any RF interference. Spectrum analyzers are available in benchtop, portable, handheld, and networked form factors.
Here is a list of a few apps and software that can help you with your wireless site survey. This is a small list, and there are many other options available. Conduct your own research to find the best WiFi site survey tool for you.
Free Site Survey Tools | Paid Site Survey Tools |
How to Perform a Basic Indoor Wireless Site Survey
Before you go on site, review the layout of the home or office, and then plot out the locations where you plan to install each indoor access point.When you are on site, use your wireless site survey tools and your spectrum analyzer to identify environmental factors, such as radio interference, andalso make note of building construction materials, both of which can negativelyimpact wireless coverage. Once we know how these factors affect the wireless signal, we can make adjustments to the installation to ensure that WiFis available where it is needed, and that the amount of obstructions or interference is reduced or eliminated.
Step 1: Identify and test AP installation locations
Identify the predetermined locations for the APs you made prior to arriving on site. Before mounting the access points, power up your access points, walk around the job site, and test for dead spots, weak signals, or interference. Remember that you do not need an active internet connection to test your APs; once you power on an access point, it will broadcast its own wireless signal.Note about AP Placement
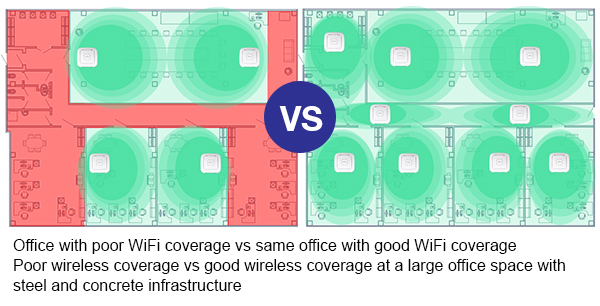
Indoor wireless access points are omni directional. Since the wireless signal is broadcasted 360 degrees around the AP, you won’t need to worry about the orientation of an access point when installing it. However, when placing your APs, make sure that the wireless signals overlap (minimum -60dB to -65dB). This ensures that users and their devices can travel from AP to AP without a lapse in coverage.

